


This section explains the changes made to the applications that work with JustFood.
 Floor
Floor
NAV Authentication
You now have the option of logging in to Floor using the NAV user authentication. You can choose between using Windows authentication (previous method) or NAV authentication. NAV authentication is used by Cloud customers, and is typically set up by the IndustryBuilt IT team.
The following changes were made:
The UseNAVUserPassword property was added to the Web.config file. You can set the property to True, which means users will log in to Floor using their JustFood (NAV) user name and password, or you can set the property to False, which means users will log in to Floor using their Windows user name and password.
Time Zone
Floor was changed so that it now handles warehouses that are in different time zones.
The following changes were made:
The FloorWebsiteTimeZone property was added to the Web.config file. Indicates the time zone that Floor will operate in. The value should match the server’s time zone and the service tier’s time zone. The value cannot be UTC.
Put-Aways and Containers
When a location uses the put-away function, and Floor is set up to create containers on receipt, the put-away now has the correct container information and can be posted from Floor.
To use this function:
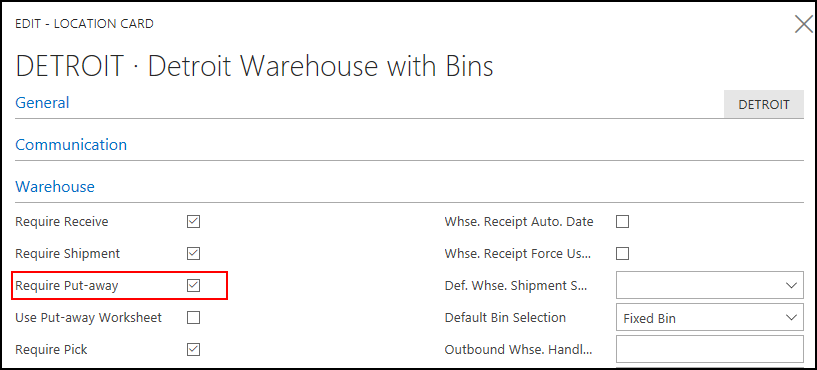
Set up the location to use put-aways.
Open the Location Card window for your location.
Ensure that the Require Put-away check box is selected.
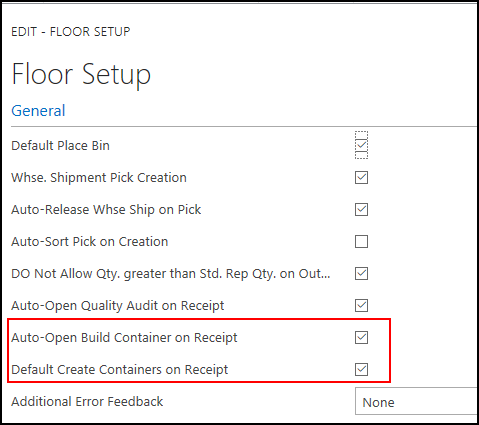
Set up Floor to create containers on receipt.
Open the Floor Setup window.
-
Select the Auto-Open Build Container on Receipt check box.
-
Select the Default Create Containers on Receipt check box.
From Floor, receive an item into a container. These steps assume that a warehouse receipt has been created. These steps are for the Classic interface.
From the Main Menu, tap Receiving.
-
Tap Whse. Receiving.
-
Select the warehouse receipt, and tap Open.
-
Select the line that you want to receive.
-
Enter your information.
-
Tap Send to send the item tracking information. The Print screen opens.
-
Tap Back to return to the Whse. Receipt Entry screen.
-
Tap Post to post the receipt. The Container Build from Rcpt screen opens if there is more than 1 line, otherwise the Create Containers screen opens and you can go to step j.
-
Select the line you want to move to a container, and tap Split. The Create Containers screen opens.
-
Enter the number of items you want to put into the container in the Qty Per Container field.
-
Enter the number of containers in the No. of Containers field.
-
Select Yes for the Label Print field if you want to print a label, and enter the number of copies.
-
Tap Create. You receive a message that a container has been created.
If there are more items to put in to containers, you will be returned to the Container Build from Rcpt screen, and you can repeat the steps.
If there are no more items to put in to containers, you will be returned to the Warehouse Receipts screen.
From Floor, put-away the items.
From the Main Menu, tap Receiving.
-
Tab Whse. Put.
-
Select the put-away that was created when you posted the warehouse receipt, and tap Open.
-
Ensure the correct information is entered.
-
Tap Post to register the put-away. The items were moved in their containers to the specificed bin.
Shipping Agent
You can now add or change the shipping agent when receiving in Floor.
To set up Floor to use shipping agents:
To select a shipping agent in Floor:
- See Enter Shipping Agent when Receiving in the Floor online help.
The following changes were made:
In JustFood, the Use in Floor field was added to the Shipping Agents window.
-
In Floor, on the Warehouse Receipts and Purchase Orders windows, the Shipping Agents field was added.
Warehouse Shipment
Previously, when a warehouse shipment was fully shipped, the Back button would take the user back to the Warehouse Shipment list with the last shipment number still populated, which would cause a message saying "No shipments are found." To prevent this message from occurring, Floor was changed so that the Shipment No. filter is now cleared in this scenario.
Plant
NAV Authentication
You now have the option of logging in to Plant using the NAV user authentication. You can choose between using Windows authentication (previous method) or NAV authentication. NAV authentication is used by Cloud customers, and is typically set up by the IndustryBuilt IT team.
Cloud Printing
You can now print from Plant in the Cloud.
In order for Cloud printing to work, when defining the report buffer path, the defined folder must exist on the JustFood service machine, and the service tier credentials must have read/write/modify access to this folder. See Define the Report Buffer Path for more information.
Time Zone
Plant was changed so that it now handles servers that are in different time zones.The JustFood service tier needs to match the client's desired time zone, and cannot be UTC.
Options
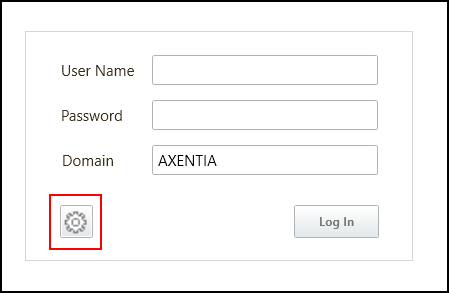
Plant users can now access the Options page from the Login screen by clicking the Options icon. This allows users to make setup changes without having to update the manifest.
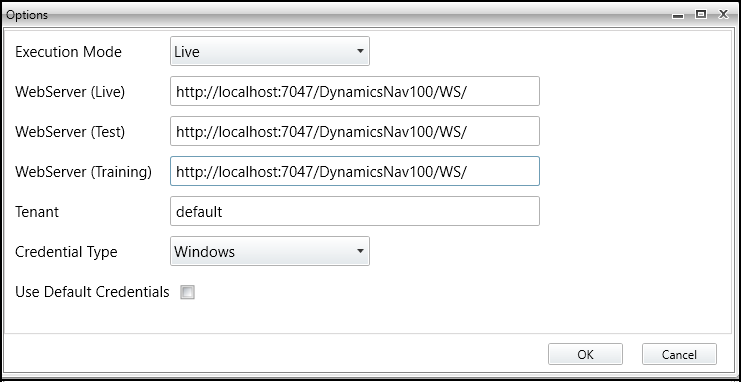
The following properties were removed from the Plant configuration file:
WSTestAddress
-
WSTrainingAddress
-
ExecutionMode
-
WSLiveAddress
-
Tenant
-
UseDefaultCredentials
Help
From the Plant tab, the Help button now opens the Plant online help. The About button was added, which shows the Plant version number.
The following changes were made:
- The HelpURI property was added to the Plant configuration file
Scheduler
NAV Authentication
You now have the option of logging in to Scheduler using the NAV user authentication. You can choose between using Windows authentication (previous method) or NAV authentication. NAV authentication is used by Cloud customers, and is typically set up by the IndustryBuilt IT team.
The following changes were made:
The ClientServicesCredentialType property was added to the Production Scheduler.exe.config file. You can set the property to NAVUserPassword, which means users will log in to Scheduler using their JustFood (NAV) user name and password, or you can set the property to Windows, which means users will log in to Scheduler using their Windows user name and password.
Help
From the Options tab, the Help button now opens the Scheduler online help.
Options
Scheduler users can now access the Options page from the Login screen by clicking the Settings icon. This allows users to make setup changes without having to update the manifest.
Time Zone
Scheduler was changed so that it now handles servers that are in different time zones. You can now define Scheduler's time zone from the FloorWebsiteTimeZone property in the Web.config file.